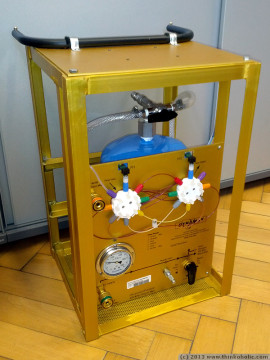
 A colleague and I recently tried to set up an HPFM at work. If you don’t find the Urban Dictionary definition for HPFM satisfying: High Pressure Flow Meters are used to measure the hydraulic conductivity of plant roots, stems and more.
The more specialized your device, the more complicated it usually is to set it up, and the HPFM Gen. 3 by Dynamax was no different: the installation process encompassed many pages of a manual that was, in some points, less detailled than we would have wished.
Here’s our own version of a software installation guide for Windows 7 (64-bit), which also contains some necessary steps that weren’t mentioned in the official manual.
Important notes:
- Please be aware that I am just an ordinary user of an HPFM Gen 3, and not in any way affiliated with Dynamax.
- Be sure to complete the hardware setup first, including filling/purging the tank and system to remove gas bubbles.
- While this guide has worked for us, it may not work for you. I cannot accept responsibility if anything goes wrong.
Installation Guide: HPFM in Win7
1. Start your computer and log into Windows as a user with Administrator rights.
2. Go to “Control Panel” – “Add/remove Programs” and make sure that “Microsoft .NET framework” version 3.5 or higher is installed.
3. Insert the Dynamax installation CD, right-click “Setup.exe”, and choose “Run as administrator”. Follow the installation process, then confirm the KeyLOK “Install Success” popup with “close”.
4. Press OK in the Winzip Self Extractor popup and continue with the installation of “Measurement Computing Software (InstaCal)”. When it’s done, confirm the system restart popup with “Yes”.
5. After the reboot, there should be:
- two new icons on the desktop:

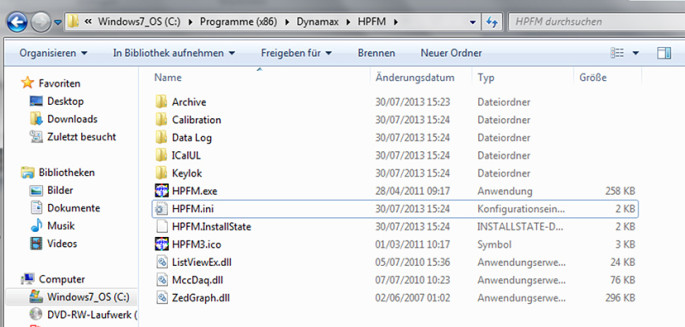
- a file called “HPFM.ini” in directory C:\Program Files (x86)\Dynamax\HPFM
6. Copy the file “CB.CFG” from C:\Program Files (x86)\Dynamax\HPFM\ICalUL to directory C:\Program Files (x86)\Measurement Computing\DAQ.
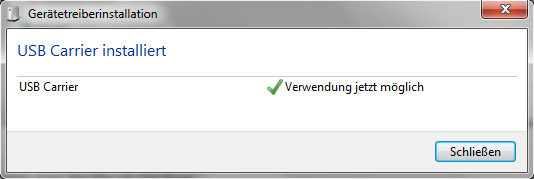
7. Next step: driver installation. Connect the HPFM (USB plug under the roof of the HPFM) to your computer using a USB cable and follow the driver installation instructions. When it’s done, you will see a popup window saying “USB Carrier installed”:
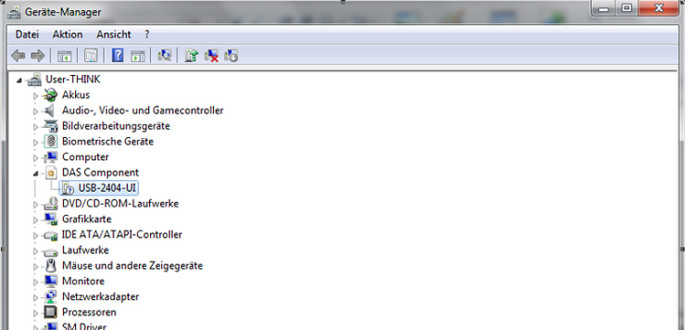
8. To make sure everything installed nicely, go to “Control Panel” – “Device Manager” (German version: “Gerätemanager”) and look for “DAS Component”.
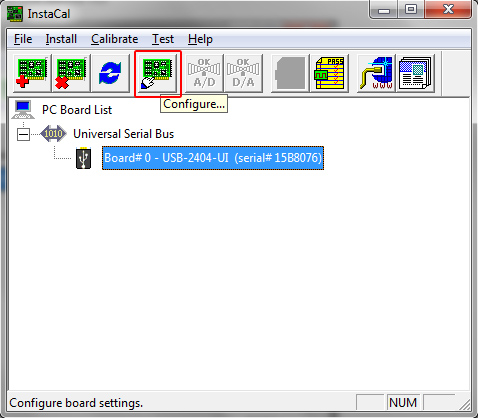
9. Start InstaCal (from the desktop icon or start menu). Click on the “Board#…” entry in the device list, then click on the fourth symbol from the left, which shows a board and hand (“Configure”).
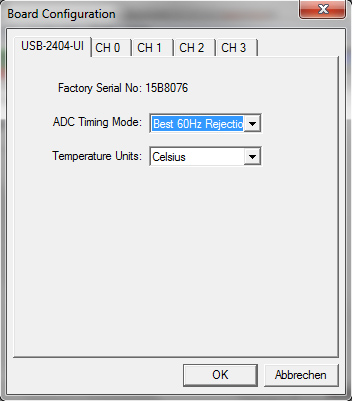
10. On the first tab, compare the settings to the following screenshot and change values, if necessary.
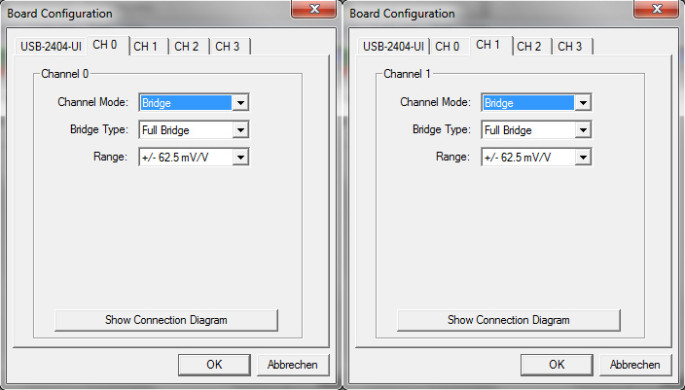
11. On tabs “CH 0”, “CH 1” enter the following values:
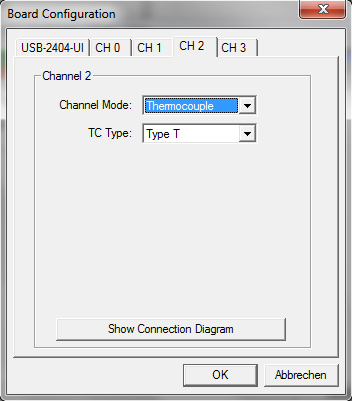
12. On tab “CH 2”, enter the following values:
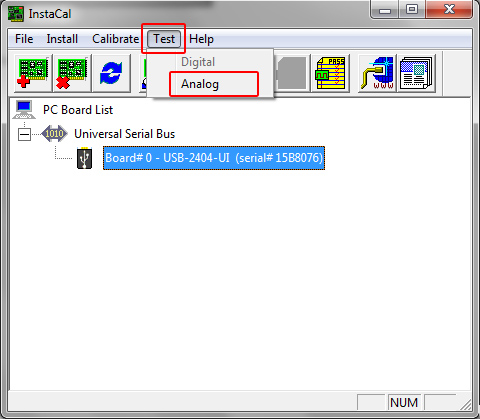
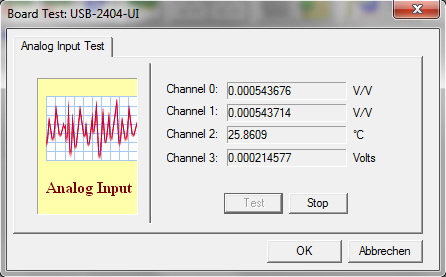
13. Run a device/communication test, via “Test” – “Analog”.
14. At zero pressure, values should be less than .004 V, at maximum pressure (560 kPa) the output should be .008 V.
15. In the CD’s root directory, locate a file called “HPFM.ini” and copy it to C:\Program Files (x86)\Dynamax\HPFM (overwrite or rename the original file in the program folder).
16. Let’s run the HPFM. Hurray!
Close InstaCal, plug in the USB license key, start the HPFM software from the desktop. It will beep.
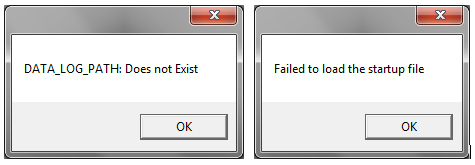
The first time you start the software, you will probably see these error messages (just close them):
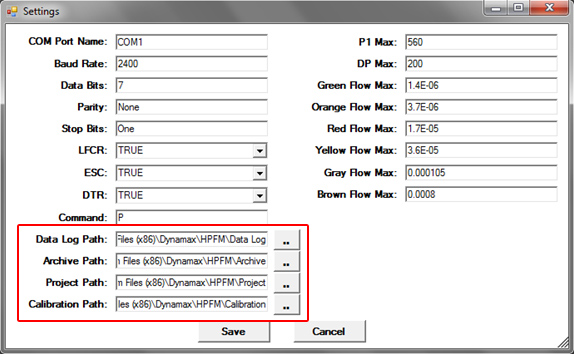
17. In the HPFM software, open “Settings” and enter a correct Data Log Path, Archive Path, Project Path and Calibration Path (we’re using the pre-created folders in the program directory):
- C:\Program Files (x86)\Dynamax\HPFM\Data Log
C:\Program Files (x86)\Dynamax\HPFM\Archive
C:\Program Files (x86)\Dynamax\HPFM\Project (created manually!)
C:\Program Files (x86)\Dynamax\HPFM\Calibration
IMPORTANT: When you change settings, the “HPFM.ini” file resets all predefined calibration values to 0 (everything below and including [DISPLACEMNENT]). You’ll later need to copy these lines from the original “HPFM.ini” file. Alternatively, instead of changing the directories in “Settings”, edit them manually in the “HPFM.ini” file, and avoid the “Settings” menu altogether.
18. Save settings
19. After saving, close the HPFM software (important!) and copy the last lines (everything below and including [DISPLACEMNENT]) from the CD’s “HPFM.ini” into the local program folder’s “HPFM.ini”.
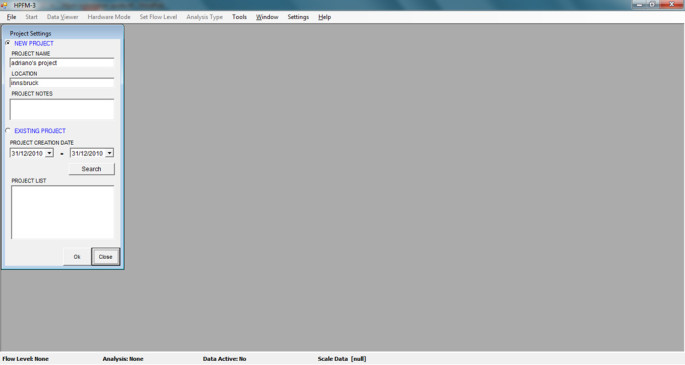
20. Restart the HPFM software and create a new project (“File” – “Open Project” – fill in “New Project” fields).
21. Press OK, and the first half of the top menu will become clickable.
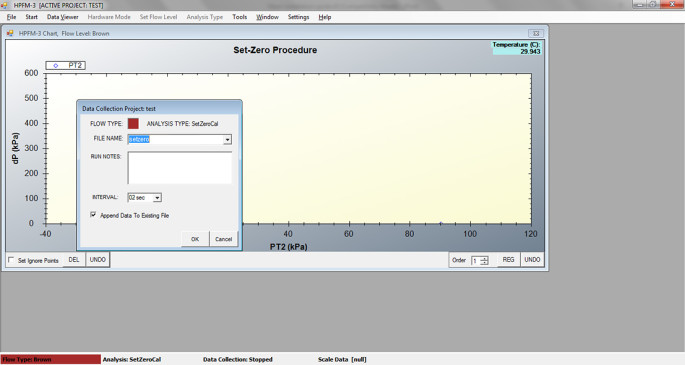
22. Start the “Set Zero” procedure: in the top menu, set “Set Flow Level” to “Brown”, “Analysis Type” to “Set Zero” and click on Start. Wait for the beeps and follow the instructions in the manual (page 41, point 5). Be sure to keep the “Flow Outlet” valve (purple) closed during the measurement.
When running “Set Zero”, if you can’t see the data points (which should be on a horizontal line), right-click the graph and select “Set Scale to Default” so you can see the entire graph.
25. That’s it. You’ve completed the software setup, and you should now be ready for your first test measurements.


![19. After saving, close the HPFM software (important!) and copy the last lines (everything below and including [DISPLACEMNENT]) from the CD's "HPFM.ini" into the local program folder's "HPFM.ini". 19. After saving, close the HPFM software (important!) and copy the last lines (everything below and including [DISPLACEMNENT]) from the CD's "HPFM.ini" into the local program folder's "HPFM.ini".](http://www.thinkoholic.com/wordpress/wp-content/uploads/2013/09/dynamax-hpfm-gen-3-software-installation-windows-7-64-bit-16.jpg)
